Installing a toilet might seem like a tough job at first, but when you are following our comprehensive guide on how to do it properly, it won’t be much of a hassle. Think of the satisfaction of knowing that you installed a toilet all by yourself.
You might want to change your toilet due to a loss of flushing power, or you are looking to renovate your bathroom. Either way, we will show you how to DIY this job without the need of hiring a professional for help. If you follow our steps to installing a toilet you will be flushing your new water closet in no time!
Why Is It Important To Know How To Install A Toilet?
Plumbing is one of the skills every DIY’er and homeowner should know. And there isn’t a more important plumbing fixture in your home than the toilet.
Installing a toilet often gets overlooked because they are big, heavy, and mysteriously complicated. But the good news is they are incredibly simple to install.
Knowing how to install a toilet will empower you to change out that worn-out water closet or upgrade your bathroom with ease!
Will The New Toilet Fit?
However, before jumping into it, you need to take a few measurements for the new toilet. Measure from the wall to the nearest toilet bolt. These bolts help a toilet stay secure to the floor and are held in place by an unmoveable flange underneath.
Most toilets will require a minimum of 12 inches between the back of the wall the water closet bolts.
Nest, measure the toilet from the nearest water supply. Be sure that there is enough clearance around the waterline and the base of the new toilet.
Also, measure from the bowl to the sidewalls or surrounding cabinets. You’ll want about 30 inches of space around your toilet. This will give you plenty of shoulder room when you are sitting down on your new throne.
Lastly, be careful if your replacement toilet is going below a countertop or shelves. We cover all of these measurements in more detail in our toilet buying guide that you can read here.

Toilet Installation Guide
This plumbing job should only take a few hours. Less time if you have help or the old toilet has already been removed. Replacing a toilet has essentially two major steps; getting rid of the old toilet and installing the new one.
To help you better, we have compiled an easy tutorial. It will guide you on how to uproot your old toilet and then replace it with a new toilet.
But first, let’s go over all the supplies you will need to swap out your water closet.
Tools And Materials Needed
You will need a few basic hand tools and materials:
- Hacksaw or Single hand saw (AKA Jab saw)
- Slip-joint or
Adjustable pliers - Screwdriver
- Putty knife
- Utility knife
- Rubber or Latex gloves
- Pencil or Marker
- Adjustable wrench
- Toilet bolt kit
- Water supply line – You can reuse the old one but we prefer a new one to ensure a leak-free connection
- New toilet
Additionally to make things easier we recommend:
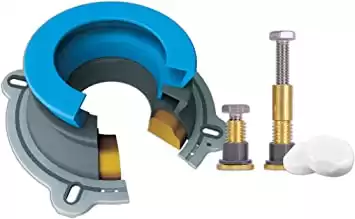
Perfect Seal has a hidden wax ring for a no mess and 3X's stronger seal than a regular wax ring!
Both the Perfect Seal and Zero Cut Bolts allow for multiple toilet repositions as needed during installation
Removing The Old Toilet
Start the process of installing your new toilet by removing the old water closet. Follow these steps to get rid of that old commode!
How To
1. Flush The Toilet
First, turn the water supply to the toilet OFF. Now flush the toilet so that it drains all of the stored water from the tank. Now, take a sponge and clean out the excess water from the toilet tank. You can use a wet vacuum to speed this process up and make sure that the toilet tank is bone dry.
Now you will want to bail the water out of the bowl. You can use a sponge, wet vacuum, or a sachet of Liquilock. You can remove a toilet with water in the bowl but it can make things tricky and heavy.
If you do decide to remove your toilet with water still in the bowl, keep the bowl steady and tipped towards the front edge to avoid water flowing past the trap. Take things slow and steady when carrying a toilet full of water and try not to splash, yuk!
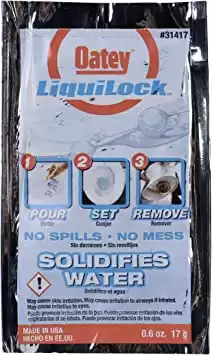
Formulated to prevent water spills when removing or replacing toilets.
Special crystals gel remaining water in the toilet trap to prevent spillage during movement. Water re-liquefies the gel, allowing it to flush away when the repair is done.
2. Disconnect The Water Supply
Next, disconnect the water supply from the toilet tank. Be careful, there may be residual water inside the tank, waterline, and flush valve. Place a
3. Loosen The Toilet Tank Bolts
You can choose to remove your old toilet with the tank attached to the bowl or separately. If you decide to uninstall your toilet as one piece be prepared that the toilet will be heavy and cumbersome to maneuver through tight spaces are stairways.
To remove the toilet tank from the bowl, start by unscrewing the two or three bolts that secure it in place. These nuts may be corroded so you may need to give them a squirt of penetrating solution to help them loosen up.
Once you have the toilet tank hardware removed you should be able to lift from the bottom of the tank and separate it from the bowl. It’s a good idea to do this while wearing
Discard the toilet tank and get ready to remove the bowl!
4. Disconnect The Toilet Bowl
Your toilet bowl bolts may be concealed with a decorative cap. These toilet bolt caps pop right off with the help of a flat blade screwdriver.
Once you have access to the bolts underneath, unscrew the nuts counterclockwise with an adjustable wrench. With the two nuts undone, you should be free to lift the bowl up from the floor. Remember, lift with your legs, not your back!
5. Remove The Wax Ring
After you have the old toilet bowl set aside or disposed of you can clean up the toilet flange that is installed on your bathroom floor. We recommend a set of rubber or latex gloves to remove the used wax ring and any excess wax left behind from the old toilet. This will give you a flat surface to work with when installing your new toilet.
Stuff a rag or
With the help of a putty knife, scrape out any excess wax from the top of the toilet flange. Carefully scrape up and remove the old wax ring and throw it away.
Keep Your Tools Clean
If you don’t want to get your favourite
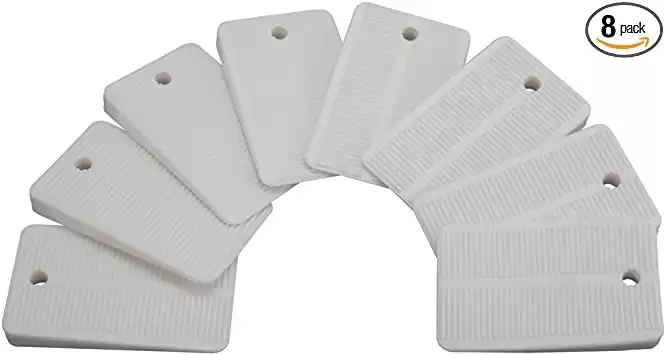
White soft plastic toilet shims that are perfect for levelling or fixing a wobbling toilet bowl.
6. Remove The Old Bolts From The Flange
Now we are nearing the end of this part half of the project. The toilet bolts that extend from the toilet flange in the floor extend up through the base of the bowl and help secure the toilet in place from down below.
You can reuse the old toilet bolts but we recommend using new hardware to ensure that the toilet is secured properly in place and to avoid damaging the toilet flange.
With a set of
7. Repair The Toilet Flange
With the old wax ring out of the way and the toilet flange exposed, now you can inspect for any damages you need to repair.
Check over the toilet flange for any cracks or damage around the toilet bolt locations. Make sure the flange is still securely fastened to the subfloor. Repair kits or complete replacement flanges are readily available to help you repair any broken or damaged toilet flanges.
Your toilet flange should ideally be slightly higher than the existing floor. If the flange is sitting lower or you plan on adding a new level of flooring on the already existing one you may need to add a flange extension. This extension will raise the flange face up and closer to being flush with the finished floor.
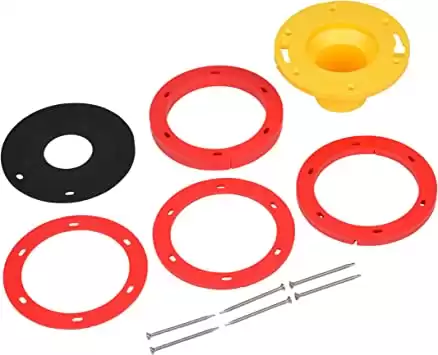
Will work for any new installation or repair on an existing toilet flange.
Extends from 1/4 to 1-5/8 to Finished Floor. Made of durable plastic and can be used on existing PVC, ABS, Cast Iron and Stainless Steel ringed flanges"
A combination of toilet flange extension and taller wax rings can be used to accommodate differing heights between your bathroom floor and the toilet flange.
Now that you have successfully removed the old toilet and prepared the toilet flange, you are ready to install a new toilet!
New Toilet Installation
Installing a new toilet can be quite easy with a little heavy lifting! It is the same procedure as removing the old toilet, just in reverse order.
How To
1. Set The Toilet Bowl
Take a new brass or plastic toilet flange bolt, which is threaded up from the end, and insert it into the flange’s collar spaces. Repeat this step for both sides of the toilet flange. Align the new water closet bolts so that they are spaced the same distance from the back wall.
Now, place the new wax rings with the round face-up on the toilet flange. If your new wax ring has a collar or extension, make sure it is pointing down the drain. Lightly press the
Hover a toilet bowl over the top of the flange, and align it completely over the holes in the base along with the closet bolts, now carefully place the toilet base on the top of the wax ring.
Now, without twisting or rocking press down on the toilet bowl carefully onto the wax ring until you feel the bowl is completely resting flat on top of the floor. Ensure that the floor is smooth and not uneven because the uneven floor will cause the toilet to wobble.

No leaks with extra thick protection!
Confidently seal your toilet with 40% more wax than standard wax seals. And it comes with an extended flange that will seal to 3" or 4" waste lines.
Use a nylon washer and place one over each bolt, make sure to hand-thread the nuts completely. Use a wrench to turn each nut one a quarter-turn at a time, alternating between the two sides. This will tighten the toilet bowl down and compress the wax ring evenly.
When you feel a firm resistance then stop tightening the bolts, tightening the bolts excessively can crack the bowl or damage the toilet flange underneath.
With the help of a hacksaw, carefully trim the closet bolts. You will want about two threads of the bolt above the nut remaining. Now cover the nut and bolt with the accompanying plastic bolt covers. These should snap in place over the washers you installed earlier.
2. Install The Tank
First, ensure that your large-diameter rubber tank to bowl washer is firmly and properly seated on top of the tank’s bottom. This rubber gasket seals the toilet tank’s flush valve to the toilet bowl.
Next, fit the tank bolts with the rubber tank washers and insert the bolts through the small holes in the bottom of the toilet tank.
Now, slowly place the tank onto the back of the bowl, gently guiding the tank bolts through the bowl holes.
From the bottom side of the bowl, install a washer and nut on the end of the tank bolts. Hand tighten each nut evenly, alternating sides every few turns. Securely hold each bolt head with the help of a screwdriver inside the tank and finish tightening the nuts with an adjustable wrench.
Snug up the toilet tank nuts equally but do not over-tighten them or you run the risk of cracking the porcelain. Once the gasket between the tank and bowl is compressed and the tank is touching the bowl you can stop wrenching.
Now you can connect the handle of the tank to the flapper chain if it’s not already preinstalled.
3. Install The Water Supply Line
We recommend using a new toilet supply line when installing a toilet instead of re-using the existing one. A new braided supply line makes connecting your toilet to the water line quick and simple!
Simply connect the plastic nut to the toilet tank water inlet and tighten firmly by hand. Then take the metal compression nut end and tighten it up snug to the shut-off valve with a wrench.
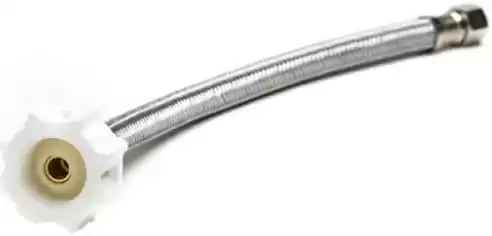
Fluidmaster toilet water supply connectors are built to last!
Made of a tough polymer core covered with braided stainless steel wire, these connectors exceed every code requirement in the book for durability.
You can also connect your toilet with rigid supply tubing. This will require a few more steps and tools to complete.
First, with the help of a tubing bender, slightly curve the supply line so that it fits in between the stop-valve and tank supply fitting. Then hold the supply pipe with the flared end upwards between the two connection points and mark the tube half an inch longer than needed. This will leave enough space for the tubing to sit inside the valve and toilet inlet.
Now cut the tubing at the point you marked with the help of a
In the following order slip the supply tube hardware onto the supply line:
- Plastic nut (with the cup facing upwards to the flared tubing end)
- Compression nut
- Compression ring or ferrule
Now apply a thin layer of
Using your hands, ensure that the plastic nut on the supply line is tightened and compressing the gasket completely. Don’t use a wrench here, overtightening can deform the supply line gasket and cause leaks.
4. Attach The Seat
Carefully pick up the toilet seat and position it on top of the bowl. Now place the plastic bolts on the seat back and pass it through the bowl’s seat holes. Tighten these nuts up so the seat is firmly in place and won’t slide around.
5. Check For Leaks
Now you can turn on the toilet water supply valve ON and let the tank fill up with water, whoosh! While the tank is filling, check your waterline connections for any dibbles or drips. Tighten as necessary.
Next, take your new toilet for a “test drive”! Flush the toilet several times, checking for leaks between the tank and bowl and around the base of the toilet.
It’s a good idea to inspect your new toilet for leaks again in 24 hours. Also, check to see if your toilet is still securely fastened to the floor and isn’t wobbling. Tighten the toilet bowl bolts if needed. Done!
How To Maintain Your New Toilet
Taking care of your new throne is easy. Follow a few simple steps to maintain your toilet and keep it flushing like the day you installed it!
How To
- Wear cleaning
gloves to protect your hands, as your toilet can be a host for all sorts of germs and bacteria. - Take a sponge and boiling water or disinfecting cleaning solution and wipe the tank, lid, seat, base, and exterior of the bowl. Make sure that you completely wipe out any stained or soiled areas.
- Use a bowl cleaner and let it sit inside the interior of your bowl for a few minutes. Then using a
toilet brush , clean off the grime or water deposits inside the bowl with a scrubbing motion. We recommend repeating this step regularly and doing it manually. Using an in-tank tablet might be convenient but it doesn’t scrub the porcelain or clean out the water inlets of performance-robbing debris. - Now flush the toilet a few times and keep on scrubbing till the water drains out from the bowl. This step will clean your brush and your bowl simultaneously.
- Use a disinfectant spray to clean off any remaining toilet surfaces and don’t forget to clean the handle, Done!
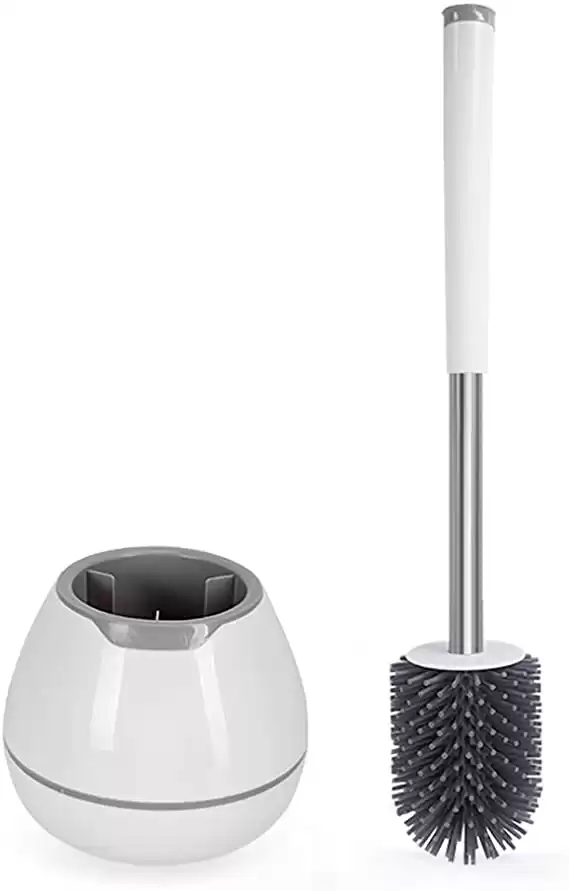
Scrubs and removes stains without scratching.
The washable brush head drys fast making clean-up a joy!
Conclusion
Knowing how to install a toilet is an empowering plumbing skill. The great news is, it’ll be even easier the next time you have to do it. And you can add another accolade to your DIY résumé.
Happy Plumbing!

Recommended Reading
How To Install A Sink Drain Properly
Is your sink drain worn out and ready for replacement? Spice up your sink with a new drain assembly that will improve the function and style of your vanity!
The Best Pipe Wrenches You Can Buy In 2021
No toolbox is complete without a pipe wrench. The problem is that a lesser made wrenches look like quality tools. We will keep you happily turning wrenches!
How To Unclog A Toilet With Or Without A Plunger
We will show you how to quickly unclog a toilet with a plunger and 11 clever ways to clear a toilet if you don't have a plunger handy.
How To Find Your Main Water Shut Off
Playing plumbing valve hide-and-seek? We will help you locate your main water shut off valve so you can close it and turn off your water.
Plumber’s Grease: What Is It And How Do You Use It
You hear a squeak in the shower. DO NOT panic! It’s not a fuzzy pest. We will show you how to stop that squeak with plumber's grease!
All You Need To Know About The Best Drain Cleaners
Drain Cleaner 101: What, When, and How to Add Drain Chemicals. We will teach you everything you need to know and how to pick the best drain cleaner for you!