Your lawn is one of the most scrutinized areas of your home. It’s the first thing that people see when they pull up to your house. An aesthetically maintained lawn increases curb appeal and creates a lasting impression with those that look at your landscaping.
Sprinkler systems help keep your lawn well-watered and luscious. But when winter comes, your green grass needs less H20 before the snow. So when the watering season comes to an end you’ll have to winterize or blow out your sprinkler system before it freezes.
Hiring professional services can ease your burden of winterizing your sprinklers but can get quite expensive. Learning how to take care of your irrigation system can save you money year after year. Our guide will answer the most common sprinkler questions and show you how to winterize your sprinkler system like a pro!
When Should I Winterize My Sprinklers?
It depends on your local weather and the change in seasonal temperatures. But as a general rule, you should winterize your sprinklers a minimum of one week before the first freeze is anticipated. So, keep an eye on the local weather reports for freezing temperatures!

ThermoPro Digital Thermometer is equipped with professional-grade sensors making it the ideal solution to get the most accurate measurements of your surroundings.
Frost Advisory
Frost advisories occur when the temperature outside is expected to fall between 36-32 degrees Fahrenheit. Your sprinkler system should be safe from damage during these dips in temperature.
Freeze Warning
A freeze warning is issued when it is highly likely that the temperature will hit 32 degrees Fahrenheit or lower. This is the weather warning that you want to be ahead of! The freezing temperature of water is 32 degrees Fahrenheit and your sprinkler pipes and other components are at risk of freezing and breaking when temperatures drop below this threshold.
Hard Freeze
This takes place when the temperature falls below 28 degrees Fahrenheit and stays there for several days. During a hard freeze, even the sunshine and daytime temperatures are not enough to make up for the decrease in temperature.
A hard freeze causes immediate damage to exposed pipes and sprinkler equipment. At this point, the most critical components of your sprinkler system are compromised and you are too late to winterize your sprinklers. Blowing out your sprinklers is made impossible thanks to your irrigation system being frozen solid.
While the sprinkler system helps your grass to look it’s best, properly timing your sprinkler winterization will save your plumbing from serious damage. Don’t worry, your lawn will survive without regular watering at this time of year. Most plants are already preparing themselves for the winter.
How Quickly Do Pipes Freeze?
Ice cubes in your freezer are formed in 3 to 4 hours. So a guideline for how fast your pipes will freeze is when the outside temperature remains below freezing for at least six hours straight. This means your sprinkler system can easily freeze overnight. So don’t sleep on winterizing your home’s irrigation systems!
Other factors influence how fast your pipes can freeze. Plumbing that is deep underground or that is insulated stand a better chance of not freezing in colder weather. That’s why your garden hose may stiffen up before your sprinkler system does.
Outside temperatures and windchill also impact how fast your plumbing can freeze. Generally speaking, the colder it gets the faster your sprinkler system will freeze.
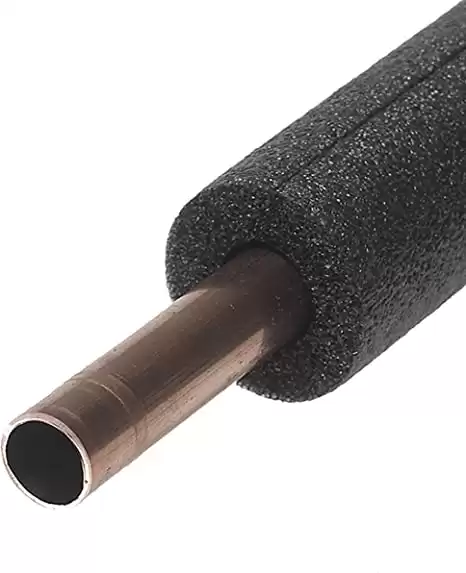
Helps prevent your pipes from freezing, sweating, and heat loss.
How Much It Does It Cost To Winterize Your Sprinklers
Hiring a profession to winterize your sprinkler system can cost between $50 to $150. This depends on where you live and how big your irrigation system is. But the national average is at $81.
If you decide to blow out your sprinkler system yourself, you will need more than just your standard air compressor. Professional contractors use commercial air compressors that are capable of delivering airflow of over 100 Cubic Feet per Minute (CFM).
These powerful air compressors can be rented locally for about $100 per day. Half-day rentals should give you lots of time to sufficiently blow out your sprinklers for about half-price. You could also team up with a neighbor and share the cost of the rental and winterize multiple sprinkler systems in a day.
Buying your own air compressor is not cheap, with 10 CFM air compressors starting around $1,000. This is a substantial initial investment but the cost can be recuperated over the years with multiple sprinkler winterizations.

The 5.5 HP Big Bore Gas Air Compressor has a powerful Honda GX160 4-stroke engine for increased performance and superior reliability, with a 'V' Twin style pump that runs cooler and provides up to 12.5 CFM at 100 PSI for faster recovery.
How Long Does Winterizing Your Sprinklers Take?
A professional can winterize an eight-zone system in about half an hour. The average homeowner can expect to take three hours or more on the same sprinkler system. It really depends on the size of the air compressor you use. A properly sized
To get a rough idea of how long your sprinkler blow out will take, add the number of sprinkler zones you have and multiply by 2. Then add at least 15 to 20 minutes for setting up and disconnecting the air compressor.
Airflow is measured in cubic feet per minute (CFM). And this CFM will dictate how long it takes to blow out your sprinkler system. We recommend a minimum of 10 CFM but most professionals use compressors capable of 20 CFM or more to completely blow the water out of your sprinkler system.
How To Winterize Your Sprinkler System
Draining Sprinklers Installed With Grade Or On A Slope
If you are lucky enough to have your sprinklers lines installed on a slope, graded back towards the
Simply shut down the main sprinkler
With all these valves open your sprinkler should slowly drain out. Once the drain valves are done dripping, replace any drain caps but keep the valves open to let any remaining water drain out of the sprinkler lines. Done!
Automatic Sprinkler Drainage System
Some irrigation systems are equipped with self-draining valves. These valves will automatically let the water drain out if the water pressure in the pipe falls below a certain pounds per square inch (PSI) level.
If your automatic sprinkler system comes equipped with integrated pumps you will have to follow the owner’s manual for drainage instructions. This is because the system will require the initialization from the control panel to drain the water from the sprinkler lines.
The self-draining valves can be activated by turning off the sprinkler system water supply and briefly running one of the sprinkler heads. Opening the sprinkler head will relieve the system pressure and allow the water to drain out.
You may still need to drain the water line between the shutoff and backflow device to completely winterize your sprinkler system.
Finally, if your sprinkler heads come equipped with check valves, these will need to be emptied separately to get all the water out and prevent the freezing of the sprinkler heads. Done!
How To Blowout You Sprinkler System
Blowing out your sprinklers is a pretty simple job and can be done quite quickly with the right tools and air compressor set up.
Tools And Materials Needed
When winterizing your irrigation system you will need a few tools and pieces of personal protective equipment (PPE).
- air compressor hose to the blow out port on your sprinkler system. We recommend one with a shut-off valve for better control of the airflow and to prevent the sprinkler heads from overheating.

Blow out adapter to easily winterize underground irrigation sprinkler systems, outdoor pipes, water lines, plumbing, homes, cabins, faucets, spigots, garden hoses, sillcocks, and hose bibbs.
- Eye and ear protection: Flying debris or water at high pressure can damage your retina. Protect your ears from the noise of the
air compressor and emptying sprinkler heads. - Phones or Walkie Talkies: These will allow you to communicate with anyone helping you on larger systems or over the noise of an
air compressor . - Garden Hose or Bucket: To help catch water and drain your sprinkler system.
How Big Of An Air Compressor Do You Need To Blow Out Your Sprinklers?
If you are looking to crunch the numbers on how big an

Simply attach between the faucet and hose and the easy-to-read meter shows you how much water you're using.
It accurately measures both single waterings use as well as cumulative water usage. Take the guesswork out of watering your lawn by attaching the meter to your sprinkler.
Total up the GPM of each irrigation zone you have and divide by 7.5. This will give you the CFM you need for your
If you don’t know the flow rate of your irrigation system, you can measure it exactly with a flow meter or get an approximate GPM with a 5-gallon bucket and a stopwatch. Divide 300 (which is 5 gallons x 60 sec/minute) by the number of seconds it takes to fill your 5-gallon bucket. This will provide your irrigation systems GPM.
Converting your sprinkler system’s GPM to CFM will make sure that you can blow out your sprinkler system all at once, saving you time and effort. If you don’t have access to a powerful enough
Not a plumbing nerd? Skip the numbers and use an
How To Set Up Your Air Compressor
Next, you’ll want to set the
Don’t Overpressure Your Pipes!
Pressurizing your system over these limits could result in damaging your irrigation pipes and sprinkler heads.
Finally, connect the

Blow Out Plug with Quick Connect provides a quick and easy way to clear out your water lines.
The durable brass is designed to last a lifetime. This Blow Out Plug with Quick Connect is a simple, cost-effective solution to help winterization of your plumbing.
How To
1. Shut The Water OFF
The first thing to do is to shut OFF the water to your sprinkler system. This water shut off is typically located in your basement, crawlspace, or mechanical room.
2. Drain Down Your Sprinkler System
Next, you will want to manually drain the water from your sprinkler system. Open your
If your sprinkler system has flow sensors installed, now is a good time to remove them before blowing out the sprinkler lines. These sensors can become damaged if you leave them installed while injecting the pipes with compressed air.
3. Set Up The Air Compressor
Now you’ll want to get the
Then, attach the
Protect Your Valves and Pumps
Do not blow the system out through a back flow valve or pump.
Now connect the other end of the air hose to the compressor. With the
4. Blow Out Your Sprinkler Lines
Depending on the size and CFM of your
To blow out your sprinkler one zone at a time, you will first need to set your system timer to open up each zone separately while keeping the others closed. Start with the zone farthest away and work your way through to the closest zone. Keeping the sprinkler on for about 2 minutes in each zone should allow for all the water to be pushed out.
Turn on the
Don’t Get Wet
Do not stand over the sprinkler heads or component parts while the irrigation system is pressurized with air. Ouch!
5. Stop, Cool, And Repeat
It’s important not to continue blowing out sprinkler lines after they have run dry. Sprinkler heads usually have plastic gears and components inside that need water to stay lubricated and cool. Running air through your sprinkler heads can generate heat and can cause them to melt if you’re not careful, whoops!
Keep Your Cool
Don’t overdo the blowout! Don’t leave the
Continue to blow out each zone until you finish with the zone nearest you. It’s important to get every last drop of water out of the sprinkler line, especially smaller diameter pipes. We recommend that you go through the sprinkler zones quickly a second time after the sprinkler heads have cooled down.
6. Shut OFF The Air Compressor
After all the water has been forced out of the sprinkler lines you can turn OFF the
7. Open The Backflow Valve
Lastly, if your irrigation system is equipped with a backflow valve, open it and allow any remaining trapped water out. After the last dribble or drip has escaped, you can close the manual drains and backflow valve, Done!
Bonus Steps: Protect Your Pipes
Now is the perfect time to insulate any above-ground pipes and valves. Wrap any exposed pipes with pipe insulation to protect them from the winter weather and prevent freezing.
You can also insulate any valves or backflow preventers, just be careful not to block any drain outlets or cover up any air vents.
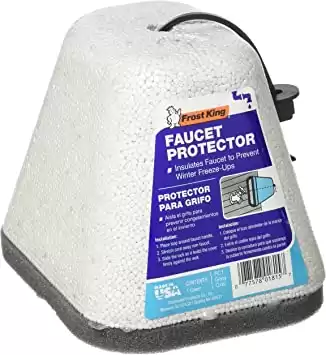
Protects your outdoor faucets from extreme temperatures.
Comes fully assembled and made of thick insulation that can be reused season after season.
Shut Down The Sprinkler Control System
Now that your irrigation pipes have been completely drained, it’s time to turn OFF the sprinkler system control panel. Preparing your hydraulic control system for winter will depend on the style of controller you have.
Outdoor Mounted Controllers
For outdoor mounted controllers you will want to leave the power ON to the unit and switch the controller to the OFF position. This will allow electricity to flow through the control unit and stay warm thanks to the heat coming off from the transformer.
The heat generated from the electrical transformer will keep the enclosure warm enough to prevent condensation from forming inside.
Indoor Mounted Controllers
Indoor control systems are the easiest to prepare for the winter. Simply leave the power ON to the control unit and switch the unit to the OFF position. This will prevent the sprinkler system from accidentally turning on when not in use.
Rain Sensors
If your irrigation system is equipped with a rain sensor you will want to dry it off and cover it with a plastic bag. Secure the plastic bag in place to ensure that no water accumulates and freezes inside the sensor.
Now you’re sprinkler system is completely winterized, Done!
When To Call The Pros
Winterizing your sprinkler system can be mastered easily but there are instances when outsourcing this irrigation maintenance is your best option. Consider hiring a professional if:
- You have limited knowledge of the sprinkler system and how it works. Blowing out your irrigation system improperly can damage components.
- If you cannot get your hands on a powerful enough
air compressor to blow out your sprinkler lines thoroughly. - If your sprinkler system has been recently installed, has a service contract, or is still under installation warranty. Blowing out the irrigation system yourself could void the warranty.
If you do decide to call an expert for help, hiring a certified irrigation professional is the best and safest choice. If you already use a landscaping company, they may be able to service your sprinkler system for a reasonable price.
Whatever you do, don’t fall prey to weekend warriors or other non-professionals. You can usually spot these individuals dragging air compressors up and down your street, offering bargain prices.
Hiring someone that is not familiar with your particular sprinkler system could end up putting too much or not enough air pressure into the irrigation pipes. Resulting in over pressurizing and damaging the system or not getting all the remaining water out and having the pipes freeze and break.
When you are searching for an irrigation company to blow out your sprinkler system, look for companies that hold professional accreditations from the Irrigation Association. Also, look for companies that are insured and back their service with a “no freeze” guarantee or similar warranty against damage. Lastly, consider professionals offering seasonal packages that include summer services as well.
Conclusion
You’ve learned how to properly winterize your sprinkler system, Congrats! Now you can sit by the fire, drink hot cocoa, and not have to worry about your landscaping chores for a while.
Keep yourself warm over the winter and soon you’ll be ready to de-winterize your system in the spring!
Happy Plumbing!

Recommended Reading
Coronavirus And Plumbing Safety
The coronavirus and COVID-19 are on everyone’s minds right now. We want to answer some questions regarding your water and plumbing systems to keep you safe.
How To Fix A Leaking Hose Bib
Don't let a leaky hose bib ruin your summer. We will show you how to fix your outdoor faucets so you can get back to having fun in the sun!
How To Fix Water Hammer And Protect Your Pipes
The quiet whoosh of water through your home’s pipes flows gently, then BANG! We will show you how to silence water hammer and it's damaging effects.
How To Easily Fix A Wobbling Toilet
Rocking or wobbling toilets can be a home owner’s worst nightmare. We will show you how to quickly stabilize your toilet, rock on!
How To Clean Your Water Heater’s Burner
The burner is the heart of your hot water tank and we will show you how to clean your water heater burner and keep it healthy and burning hot!
How To Unclog A Toilet With Or Without A Plunger
We will show you how to quickly unclog a toilet with a plunger and 11 clever ways to clear a toilet if you don't have a plunger handy.