Are you haunted by phantom flushing? The spooky sound of water rushing inside your toilet tank, filling up in eerie intervals even if the lavatory is unoccupied. Don’t worry, your porcelain is not possessed and luckily for you fixing a leaky toilet tank is not a scary repair, no exorcism required!
Toilet flappers are the leading cause of leaking, running, and spontaneously flushing toilets. Flappers or flush valve seals are essentially a plug or drain stopper that falls and rests against the drain hole on the bottom of the tank that keeps the water stored till you you need to flush.
When the toilet handle is pressed, it lifts the flapper initiating the flush cycle. When these flappers wear out, water trickles into the bowl and causes the toilet tank to refill and continually replenish the lost H2O, Whoosh!
Flappers typically last 4-5 years depending on water quality and use. They will warp and wear out more often if you use harsh chemicals to clean your tank or use drop-in
While this type of plumbing leak isn’t going to cause any serious damage to your plumbing, but it could wreak havoc on your wallet. A minor toilet leak could waste thousands of gallons of water and end up costing you almost $100 dollars per month!
What You’ll Need
- Gloves – We recommend latex-free nitrile gloves
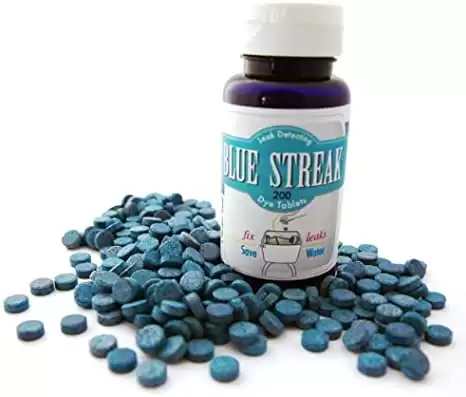
- Leak detection tablets – Optional
- Measuring tape
- Replacement flapper – We will show you which one you need later
- A garbage bag or trash can at the ready
Choosing The Right Flapper
Most toilets tend to have either a two or three-inch flapper but the majority of tanks require a two-inch model. If you are unsure, you can use your “eye-crometer” and guess or grab a measuring tape and find the diameter of the flapper or flush valve opening. Here’s a diagram to compare yours to:
Now it’s time to buy a replacement flapper that best matches up to your old one. Our professional recommendation is to stick to Fluidmaster products whenever possible. Fluidmaster is most often the OEM (Original Equipment Manufacturer) for most toilet fill and flush valve assemblies. They are also the #1 toilet repair brand in the world with Fluidmaster parts found in more toilets around the world than any other brand combined!
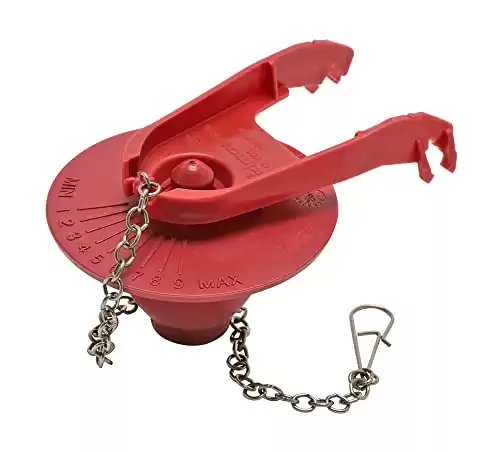
Fluidmaster 2-Inch Universal PerforMAX Longest Lasting, Water Saving Toilet Flapper
- Easy installation
- Universal design fit most 2″ flush valves
- Solid frame construction to prevent twisting and ensure a water-tight seal
- Chlorine and hard water-resistant with 5-year manufacturers warranty
- Adjustable dial to save water usage
Get a handle on toilet troubles.
This toilet flapper is adjustable for optimum performance and water savings, is corrosion-resistant, and has a solid frame for ultimate reliability.
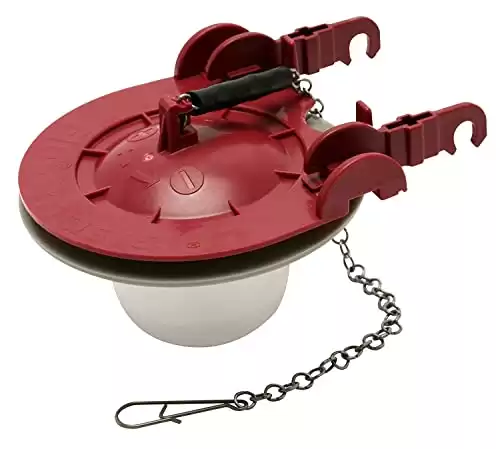
Fluidmaster 3-Inch Universal Water Saving Toilet Flapper
- Easy installation
- Universal fit for most 3″ flush valves including American Standard, Kohler, Toto, and many more
- Adjustable dial allows you to customize performance and water savings
- Solid frame and long-lasting silicone seal backed by a 10-year manufacturer warranty
Installed in more toilets than all other brands combined.
Adjustable mounting arm, adjustable float ball for OEM performance, easy installation, injection molded frame and float, silicone seal and kink-free stainless steel chain.
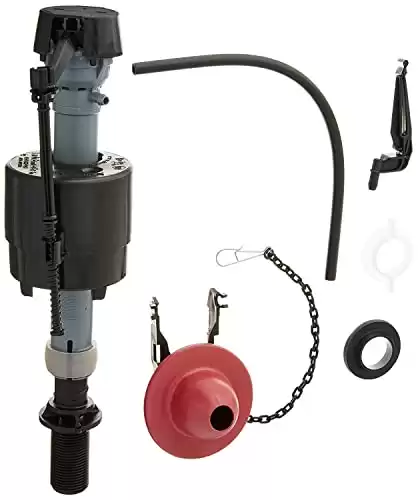
Fluidmaster Universal Toilet Fill Valve and Flapper Repair Kit
- Comes with their 400A anti-siphon toilet fill valve and 2″ rugged toilet flapper
- Save money by bundling these items together
- Comes with 5-year manufacturer warranty and is the best solution to fix noisy and running toilets
Get your toilet flushing like new again!
This kit includes a solid frame flapper that aligns with the tank drain every time for a consistent, powerful flush.
Replace your leaky flapper and damaged fill valve in ten minutes or less!
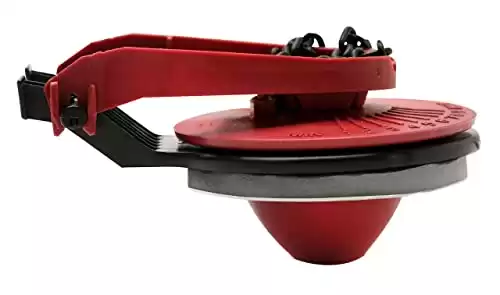
Fluidmaster Universal PerforMAX 5 Minute Toilet Flush Valve Repair Kit
- This is a replacement flapper and a putty seal to repair pitted or damaged flush valves.
- It will restore flushing performance if replacing the flapper alone does not stop the leak
- Easy, no tank removal installation. Just peel and stick!
- Chlorine resistant rugged design comes with a 5-year manufacturer warranty
Upgrade your flush valve and flapper with this water-saving kit!
The toilet flapper works as the doorway between the toilet tank and bowl. The Fluidmaster Flush Valve Kit upgrades your leaking toilet to save water and money, with an easy to install design.
How To
This repair is quite simple and easy to complete in a few minutes. Start off by diagnosing your toilet tank to ensure a faulty toilet flapper is the culprit. Check to make sure water is not seeping out of the bottom of the tank where it meets the bowl and leaking onto the floor. Still dry? Good, now add a few drops of food coloring into the toilet tank.
Don’t have any food coloring kicking around? Drop a leak detection tablets in the tank, wait a few minutes, and if blue water shows up in the bowl you have found the cause for the leak! You can get yours here:
Save money on your water bill.
Detect toilet leaks quickly and easily with these professional-grade tablets.
Shut the water off to the toilet and flush the remaining water in the tank into the toilet. Now remove the old flapper and check it for any deformity that could result in improper sealing against the flush valve.
While you’re at it, inspect the flush valve seat for pitting or damage. A faulty flapper may show obvious signs of abnormality and wear from water leaking by.
1. Turn Off The Water
Begin by shutting the water supply off to the toilet tank.
2. Remove The Toilet Tank Lid
Set the lid aside in a safe place to avoid scratching it.
3. Drain The Toilet Tank
Press and hold the toilet tank handle or trip lever down and drain all the water out of the tank.
4. Remove The Old Flapper
Disconnect the flapper chain from the tank lever and remove the old flapper.
5. Prepare The Flush Valve
Clean the flush valve drain seat of any crud or hard water deposits.
6. Install The New Flapper
Install the new flapper over the flush valve “ears” and reconnect the chain to the tank lever.
7. Test And Clean Up
Turn the water supply on, refill the tank, and check for leaking into the bowl. Adjust the chain length if necessary after a “test-flush” or two. Replace the toilet tank lid, done!
More of a visual learner? Check out this video from Fluidmaster:
Conclusion
That’s all there is to changing your toilet flapper and eliminating a continuously running toilet! By finishing this DIY repair you saved money on not paying a plumber to do it and keeping your water bill in check.
Since you’re a professional now at fixing leaking toilet tanks, now is the time to use some more food coloring or those dye tablets we recommended and test out your other toilets for slow leaks.
Keep in mind that if your water quality isn’t great, you may be more susceptible to changing flappers more frequently. Also, avoid chlorine
Enjoy the satisfaction of fixing it yourself and ridding your toilets from ghost flushes, phantom fill-ups, and running non-stop.
Happy Plumbing!
Recommended Reading
Coronavirus And Plumbing Safety
The coronavirus and COVID-19 are on everyone’s minds right now. We want to answer some questions regarding your water and plumbing systems to keep you safe.
How And When To Use An Internal Pipe Wrench
The internal pipe wrench shines in the world of rusty and broken plumbing. We will show you how to use this piece of plumbing ingenuity!
How To Easily Fix A Wobbling Toilet
Rocking or wobbling toilets can be a home owner’s worst nightmare. We will show you how to quickly stabilize your toilet, rock on!
9 Most Important Plumbing Tools You Absolutely Need
Fixing your plumbing can be frustrating, especially without the right equipment. But what plumbing tools do you actually need?
How To Turn Your Sprinkler System Back On In The Spring
Spring is here and your lawn needs water! When it comes time to turn on your sprinkler system wet will show you how and when to get started.
Plumber’s Grease: What Is It And How Do You Use It
You hear a squeak in the shower. DO NOT panic! It’s not a fuzzy pest. We will show you how to stop that squeak with plumber's grease!

