With winter on its way, your to-do list may very well be growing. As the fall season is upon us, there’s pumpkin carving, turkey roasting, and beautiful changing leaves ahead. But, there are also some key things you need to be taking care of around the house before the cold hits!
Winterizing your hose bibs may not be something you’ve given a lot of thought to, but it should definitely be on your list. To make it easy on you, here’s the when, why, and how to keep it simple.
When Should I Winterize My Outdoor Faucets?
October, the start of Fall, would be the best time to winterize your outdoor faucets. Wait much longer and the freezing temperatures may very well beat you to it! However, if you’re already well into the cold season, you should try to do it as soon as possible.
To make things simple, winterize your outdoor faucets at the same time you blow out your sprinkler system.
If you have leaks or if you want frost-free hose bibs installed to make your job easier, get on the phone and talk to a plumber sooner than later or you could be setting yourself up for a headache.
Why Should I Winterize My Hose Bibs? What’s The Danger If I Don’t?
Feel like your hose bibs are the least of your worries? We wish they were! Unfortunately, while it can seem like a tedious task, winterizing them is a critical part of getting your home ready for the cold temps. Ultimately, it’s a must-do before the temperature drops to below freezing. Generally, 20 degrees is when you start having issues.
The reason why you need to winterize your hose bibs is because the pipes found outside your home may start freezing once the temperature drops to 20 degrees or colder. That means the water inside can freeze and expand, which could result in a pipe bursting. No fun in the middle of winter, as you can imagine!
A burst pipe will lead to costly repairs and it could even cause structural damage, but not to fear. Many homeowners choose to invest in frost-free hose bibs to help ward off such issues. But, regardless, winterizing your outdoor faucets isn’t tough or particularly time-consuming, it’s just something you need to remember to do at the right time of the year.
Should I Invest In Frost-Free Hose Bib ?
If you don’t already know them, a frost-free
Sound convenient? Some community codes actually require frost-free bibs and, even if yours doesn’t, installing one may be a good idea just to save yourself the hassle of winterizing or the hefty expense of a frozen pipe. You should consider it a must if you live in an area that regularly gets below 20 degrees during the winter.
Installs in seconds!
The SharkBite Push-To-Connect Anti-Siphon Frost-Free Sillcock has a 1/2? push-fit inlet that is compatible with Copper, PEX, CPVC, or PE-RT pipes and a 3/4? MHT outlet.
The valve comes with an integrated mounting flange to secure it to the mounting surface. There is also an integrated air gap backflow prevention system to prevent any potential back-siphonage.
Do Frost-Free Faucets Need Protection?
Okay, so a frost-free
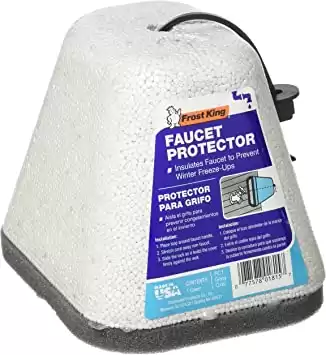
Your frost-free faucets will also need protection because they can still freeze in extremely cold weather. Even when properly installed, you might consider adding an insulated
Protects your outdoor faucets from extreme temperatures.
Comes fully assembled and made of thick insulation that can be reused season after season.
How Do Outdoor Faucet Covers Work?
If you’ve never seen an outdoor
They feature a rubber pull tab that allows you to easily secure the cover over your faucet and up against the siding of your house to help prevent frost and keep it dry from the outdoor weather. When you need to use your hose, the cover is easy to remove, just pull on the tab to get the cover out of your way and you can access the spigot as normal.
How To Winterize Your Outdoor Faucets
Frost-free or not, winterizing your faucets is as easy as -1-2-3. Here’s what you should do.
What You’ll Need
You’ll only need a handful of items to help you get the job done. Those include:
- Faucet repair materials, as needed
- Insulated
faucet covers
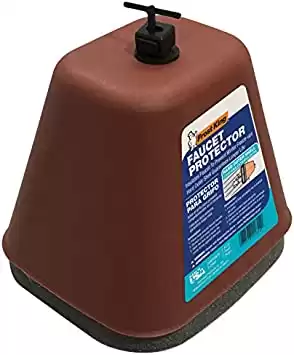
Protect your outdoor faucets from freezing, wind, and chilly weather.
These covers have a hard outer plastic shell to prevent freeze up in the winter season. Easy to install and insulate your regular and stand-style hose bibs.
1. Disconnect Your Hoses
The process starts with getting as much water out of your hoses, and out of the pipes, as possible. That means disconnecting hoses and removing all faucet attachments long before freezing weather arrives. This can be tricky since many people want to retain access to their hoses up until the very first sign of winter, but even a single night of cold temps can burst a pipe — so stay ahead of the cold!
2. Repair Your Outdoor Faucets If Needed
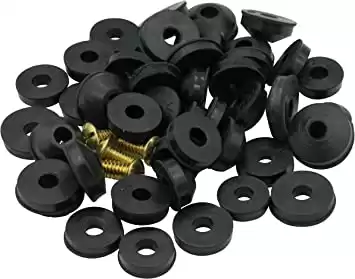
After you’ve disconnected everything, it’s time to give your outdoor faucets a good once-over so that you can check for any leaks and make any necessary repairs. If you notice any dripping water, that means there’s a leaking washer or cartridge inside the spigot and it needs to be addressed before the cold comes. Otherwise, that could cause the pipe to get blocked up and freeze at the spigot or inside the pipe leading to it.
Contains all popular sizes of washers and brass screws.
Premium quality faucet sink washers that are precision moulded of tough neoprene rubber material.
3. Shut Off And Drain The Water
Now you need to get all the water you can out of the spigot itself, which involves draining the line by shutting off the water to it and then leaving the spigot open for a few hours to allow the remaining water to run out. Make sure to close the spigot again once you’ve allowed all the water to drain from it. If you don’t have access to a shut-off valve, you should definitely use a
4. Insulate And Protect
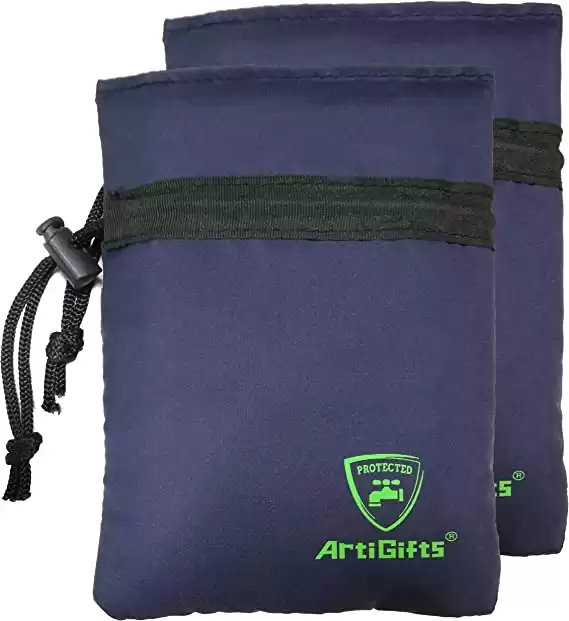
The next step is simple: Grab one of those handy faucet covers we talked about before and get ready to put one on all of your outdoor faucets. Don’t worry, they’re cheap and extremely easy to put on (and take off, when the time comes). This is probably the easiest part of the winterization process, and it marks a job well done.
Universal fit with superior waterproof and insulating design.
These outside spigot covers were made of heavyweight polyester pongee waterproof fabric and special PP insulated cotton, which possess the characteristic of good waterproof and insulation to guard against severe weather in winter such as freezing rain and snow.
Now that you can cross this off your to-do list, you’re just about ready to consider your home winterized. But, we have one more tidbit for you…
Bonus: Add Pipe Insulation !
Want to make sure your pipes don’t freeze this winter? Here’s a fun bonus for you, if it’s in your budget. Adding pipe insulation is an extra layer of protection from the bitter cold, and it’s especially beneficial if you don’t have a way to shut off the water to your spigot from inside your home (or if you intend to be using your hose during the colder months).
The most critical pipes to insulate are those water pipes that run through the unheated areas of your home, including exterior walls, unheated garages, and in the cavities of your floor above crawlspaces. Fortunately, this is an easy enough “DIY” project that you can do yourself.
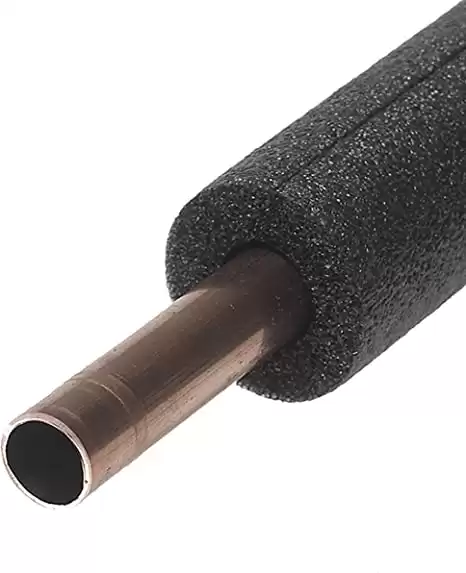
Helps prevent your pipes from freezing, sweating, and heat loss.
The process is simple! Start off by measuring the size of the pipe you are looking to insulate. The most common pipe sizes are 1/2” and 3/4” for hose bibs and 1” for irrigation or sprinkler systems. Next, you will want to determine how many linear feet of pipe you need to insulate.
Pipe insulation comes in pieces that are a few feet long for small sections of pipe and long rolls for bigger jobs. This insulation is a high-density foam that comes in a cylindrical form with a slice all the way down its center. This allows it to be easily applied onto the pipe, with its shape automatically forming around it.
You just need to secure the insulation in place with tape every so often. We suggest using duct tape if you aren’t purchasing a self-adhesive pipe insulator. The most time-consuming part will be locating and accessing all the pipe that you wish to insulate, but it makes for a fairly speedy weekend project that will help you season-after-season. Done!
Conclusion
It might seem like a time-consuming chore now, but properly winterizing your outdoor faucets can be done quickly now can save you a lot of stress later. Most importantly, you won’t have to worry about frozen and burst pipes damaging your home.
Plus, you get your yard back for more weather-appropriate activities like jumping in piles of leaves and drinking apple cider, yay!
Happy Plumbing!
Recommended Reading
How To Install A Toilet
Installing a toilet might seem like a daunting DIY project, but it's really quite simple. Our guide will have you flushing a new toilet fast!
How To Solder Copper Pipes Like A Pro
Soldering copper pipes with an open flame may seem intimidating but fear not. With our guide, we will take you from beginner to soldering pro in no time!
How To Repair A Garden Hose
Nothing ruins your outdoor fun faster than a leaking garden hose. Save money and your hose by fixing it yourself in five minutes flat!
How To Clean A Garbage Disposal And Prevent Odors
Nobody likes garbage disposal smells. We sill show you how to properly clean your garbage disposal and stop the stink in your kitchen!
Everything You Need To Know When Buying A New Toilet
Did you know that the average person spends nearly a whole year on a toilet over their lifetime? Let us help pick the perfect new toilet for you!
How To Treat Tree Roots In Your Sewer Line
Don’t get stumped by tree roots in your sewer! We’ll show you how to keep your plumbing flowing tree-rifically!


